
I get it.
Power tools can be very intimidating when you don’t know how to properly use them.
I mean how often are you around things that make a lot of noise and could take your fingers off in a blink of an eye….. considering my audience is a bunch of animal lovers, I may be talking to the wrong crowd. The truth is, power tools aren’t that scary and when used correctly are very safe and straight forward to operate. Almost all of them have built in fail safes that prevent loss of bodily fluids and dismemberment but in order for these failsafes to work, again, they have to be used correctly and this is where “A Beginners Guide to Power tools”, comes in. In this “How to build just about anything” series we will be covering a variety of lessons to make you the handiest person in the room, to start we will be exploring A Beginners Guide to Power tools. A Beginners Guide to power tools will teach you how to safely use all about the tools you will needs to conquer most everyday tasks, from building a shelf to fixing a staircase.
The Essentials
Safety Glasses
Lets start with the most important item on this list, one that you should always be using when operating any power tool and should never leave home without, Safety Glasses!
No matter what power tool you are using, there is a chance that wood chips, metal shavings and other particulate may be thrown toward your face at high speeds. That is why you should always wear safety glasses, they will safely protect your eyes against a variety of high speed projectiles that may otherwise cause damage to your eyes. You’ll need these for every tool in the beginners guide to power tools.
Wear them!
A pencil
If I need to explain how to use one of these your either 3 years old or should not be using power tools in the first place.
But seriously a pencil is something you should always have on you when doing any sort of handy work. It allows you to mark where you are going to cut and write down measurements that, although you think you are going to remember…. your probably not.
Measuring tape
The second most important thing on the list is the measuring tape. Using this correctly will be the difference between nice snug perfect cuts, and gaps that you can fit your finger through (these also result in frustration, yelling profanities and wasted materials).
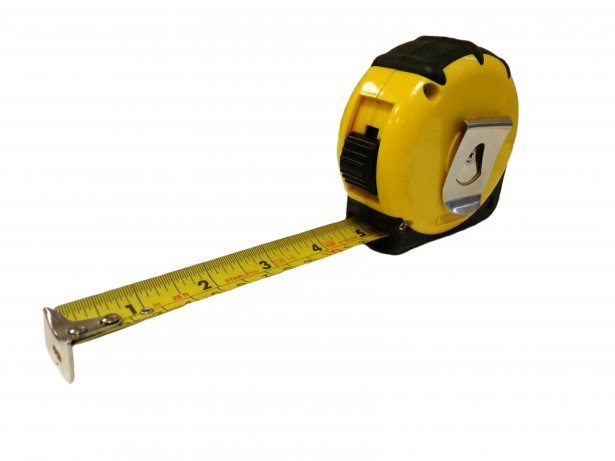
This will be easiest to understand if you pick up a tape measure and look at it while reading this.
How to use a tape measure:
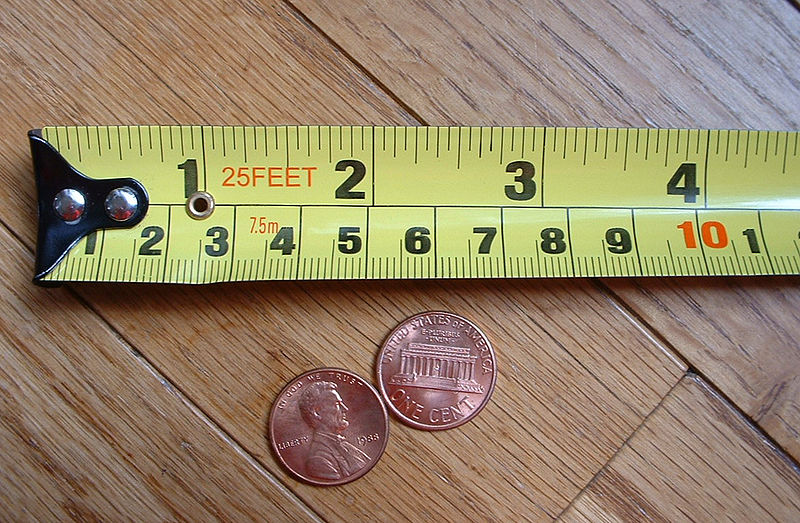
- When you open the tape measure, the first things you will notice is the inch lines, these are marked by the largest lines with the numbers below them. These mark every inch along the tape, the more challenging part of reading a tape measure is all the smaller lines in between the inch lines.
- In order of size, the next largest line is your half inch line, followed by your quarter inch line followed by your 1/8 inch line followed by your 1/16 inch line, which is the smallest line on your tape.
- To use the tape simply place the metal hook of the tape on one end of an object and pull the tape over to the other end and look at the line that the other side lands on.
- If the tape lands on a 1/8 or 1/16 line simply count the total amount of lines in between the last inch line and the line that your material ends on, the total number will be the numerator in the fraction. For example if you count 5, 1/8 lines between the 3 inch mark and the 1/8 mark that you are counting from the measurement would be 3 and 5/8.
- Another example using the picture below: The penny to the right is lined up on the 2 inch mark and ends on the 5th 1/8 mark which means the penny is 5/8 of an inch long.
Combination Square
This is a tool many people have never used or heard of but Is a really easy way to step up your carpentry skills by allowing you to draw perfectly straight and “square” lines and that is why I consider it an essential item.
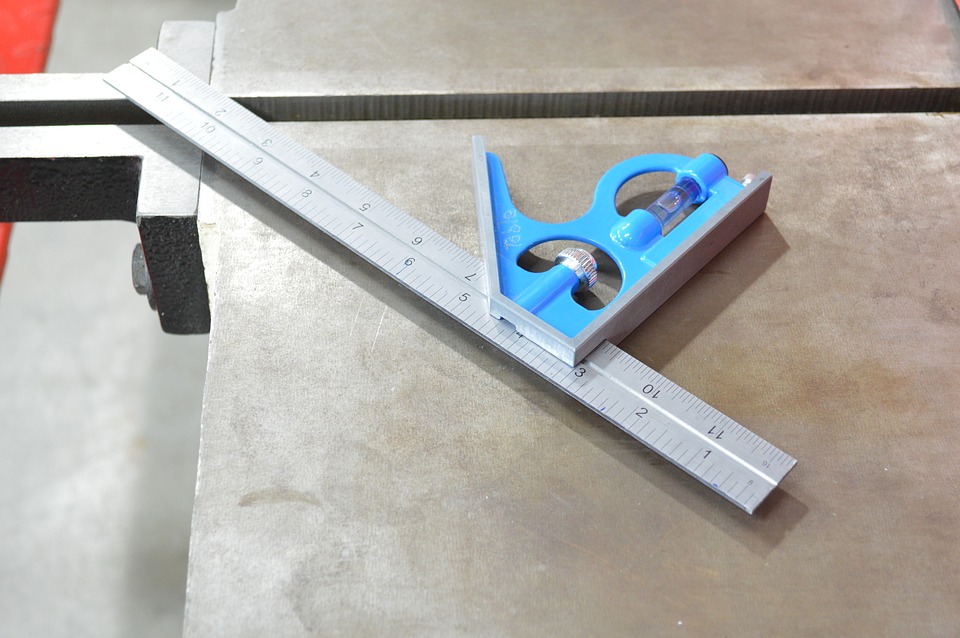
This item is essentially a ruler with a metal device added to it that includes a levelling bubble, the main function of this device is that is forms a perfect 90 degree angle with the ruler. To use this item simply use the screw beside the ruler to move the metal piece up or down depending on the length of the line you want to draw. Then you take the straight edge of the metal piece and place it flush against the material you are working with (generally the straight edge of a piece of wood works best for this) and then you can use the ruler end to trace a perfectly straight line that is 90 degrees from the edge you lined the square up on. There is also a levelling bubble on this device which will tell you if the surface you are using is level or not. When a surface is “level” the bubble will sit in between the two black lines in the middle. Ive included a video below to help you understand how to use this tool as well as a few handy tricks to the combination square!
Basic Power Tools
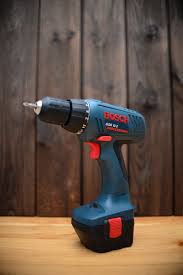 Drill
Drill
Since this is the beginners guide to power tools, its about time we talked about how to use some power tools! Well this is generally considered to be the most basic power tool there is, one that most people have experience using. Its by far the safest power tool on this list and the easiest one to master, and the one you will probably use the most.
How to use a drill:
- The first thing you will notice about a drill is the trigger and the button above it on either side of the drill. The trigger is what you’ll use to make the drill turn and the button above it will control the direction of the turning. If the button is pressed all the way left the drill will turn forward and if the button is pushed all the way right it will go in reverse. You’ll need to use this for taking screws in and out.
- The next thing that you will notice is the sliding switch at the top of the drill and the ring of numbers around the drill with an arrow pointing to one at the top of the drill. The Switch at the top selects your gear (high or low) and the numbers in the ring select your torque. You can play around with these as you use the drill and see what situation calls for what torque and what gear. Generally for projects that are more delicate you can use a low gear and a low torque, such as putting a small screw in a thin sheet of plywood. Tasks that require more power such as drilling holes can be done with the highest torque and highest gear.
- Bits can be put in and taken out easily by spinning the “Chuck” (the front barrel of the drill) either clockwise or counter clockwise to tighten or loosening the teeth that hold the bit in place.
- I have attached a video demonstrating these concepts below.
https://www.youtube.com/watch?v=grnoi528kCY
Circular Saw
The circular saw can be very intimidating to some people as it looks complicated to use and has a large spinning blade, but this tool can be one of the most versatile and useful tools in your workshop for a variety of reasons. For 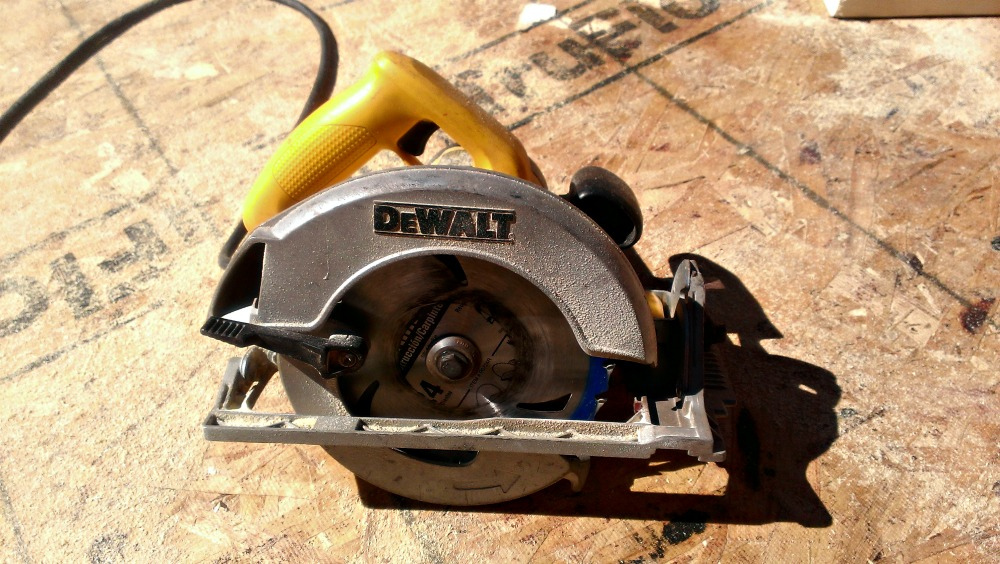 starters, its very small and easy to take from one project to the next, especially with a cordless version, you can also use this tool to cut a variety of materials at angles from 90 degrees to 45 degrees. This means you can use it to rip plywood and even make 45 joints with a 2″x4″. Despite being versatile it is very easy to operate.
How to use a Circular Saw
- Similar to the Drill, the Circular saw is operated by a trigger, most of the newer saws also have an extra safety switch near the trigger that needs to be pressed as well as the tigger in order to operate the saw.
- One important thing to note on the saw is the blade guard that is built into the saw, this guard will also retract automatically as you cut.
- There are only really 2 adjustments you can make to the saw, the depth of the saw and the angle at which the saw cuts, these are both adjusted via two wing nuts on the side of the saw. The depth of the saw should be adjusted so the blade is about a quarter inch deeper then the material you are cutting, this will allow the guard to function properly and will also make the chance of injury less. The angle can also be adjusted through a separate wing nut on a track labeled 90-45, for most tasks this can be left at 90 but for some projects such as joints it can be adjusted.
Reciprocating Saw
This particular saw is not nearly as precise as the other saws on this list and for that reason it makes it useful for demolition or rough cuts in places where other tools won’t fit or aren’t necessary. Depending on the blade you have 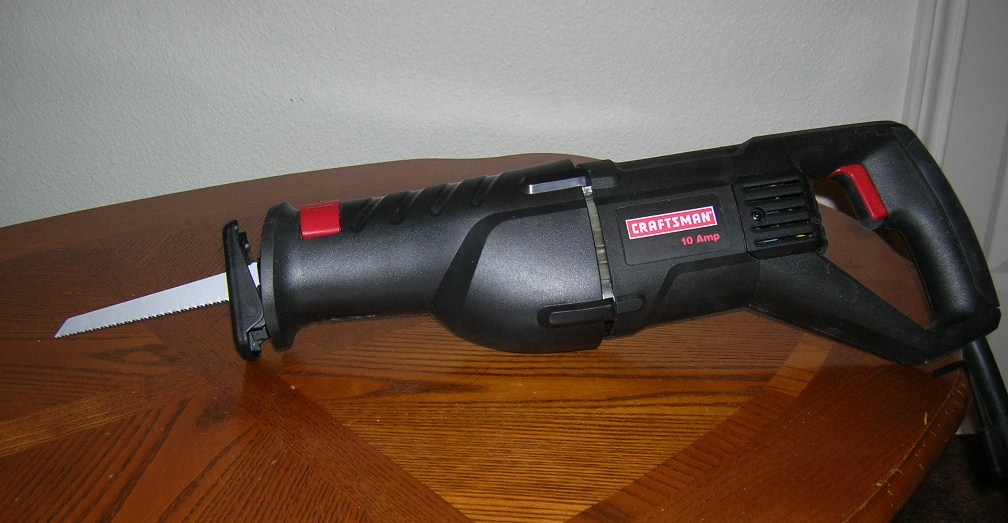 on the saw, it can cut metal, wood and even plastic. Don’t let this saw intimidate you with the amount that is can move and shake as you cut, with proper technique it can become a staple in many of your day to day maintenance tasks.
How to use a Reciprocating Saw
- This saw is extremely easy to operate. Like all the power tools on this list, this saw is operated by a simple trigger mechanisms that functions as the speed control as well. The only other button on the saw will generally be a safety mechanism above the trigger which prevents the trigger from being pulled accidentally as this saw does not have any sort of built in blade guard.
- To use, simply place the saw blade on the material you want to cut so the material is touching the metal tip of the saw located on the end of the tool. This will prevent the saw from shaking the material so much as you are cutting. Once you’ve done this you can pull the trigger and with very little pressure push the saw through the material.
Jig Saw
The Jigsaw is the most specialty saw on here and one that you can get away with not having for the majority of day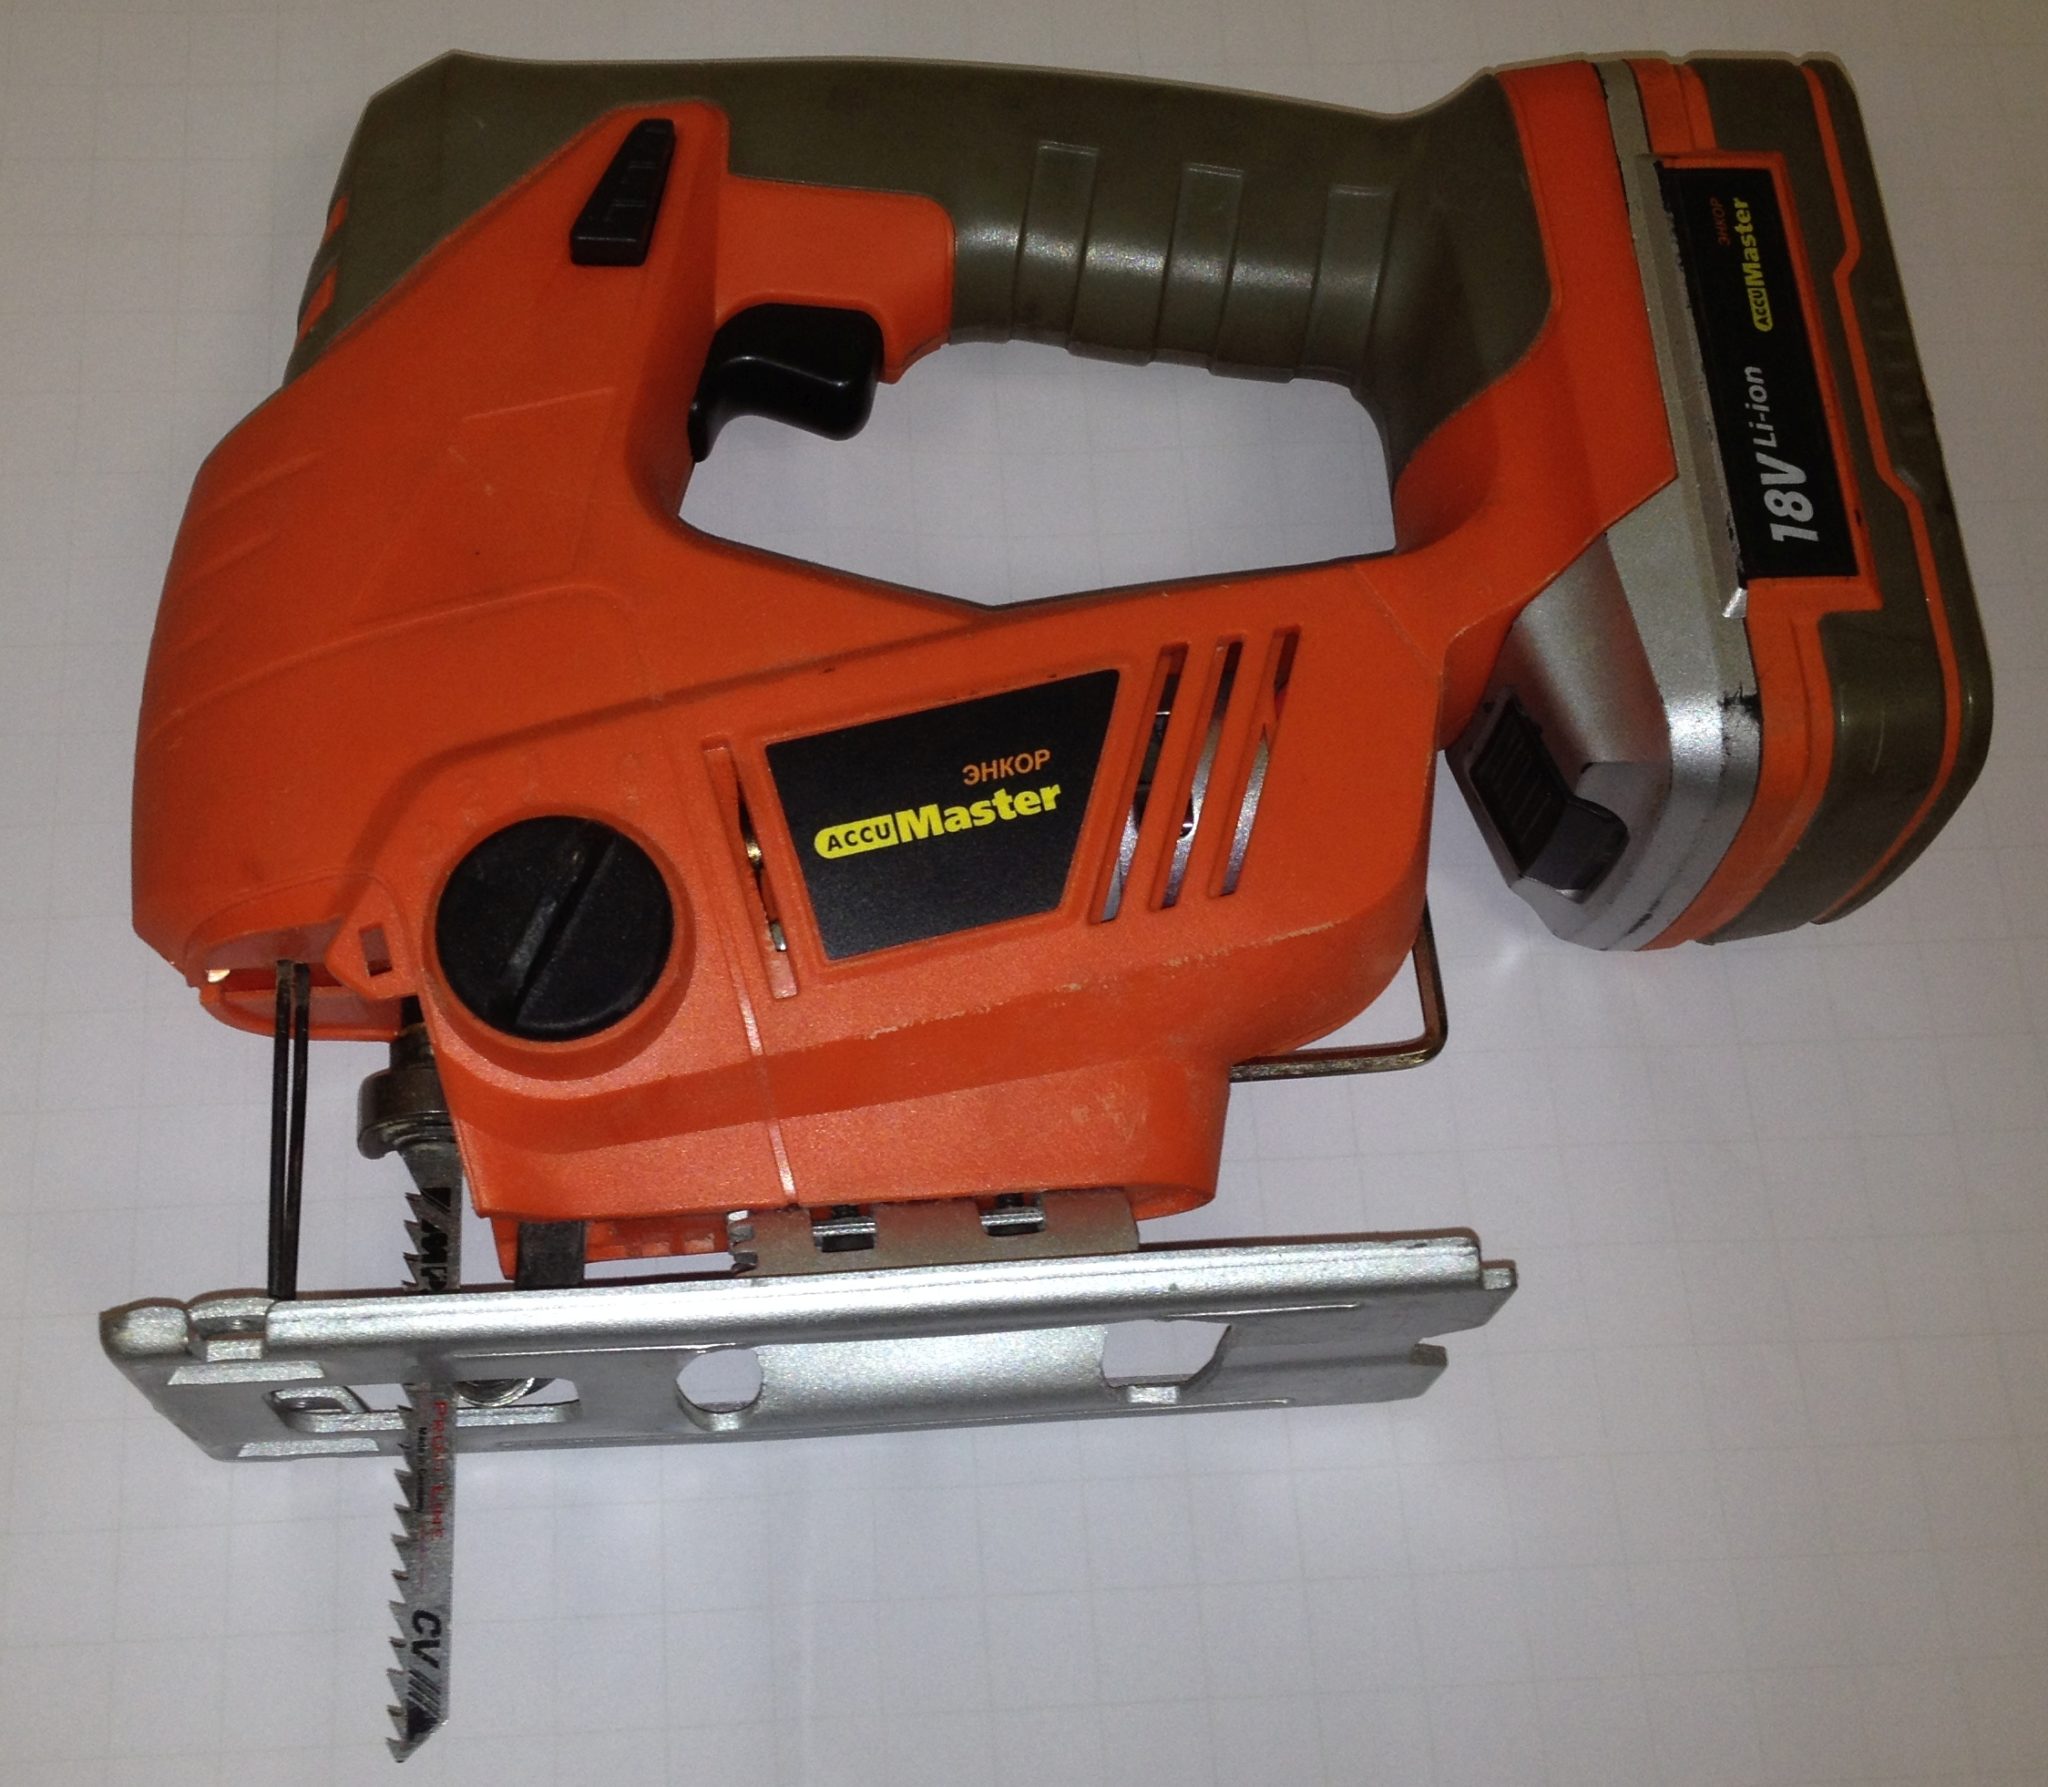 to day woodworking/ maintenance projects you may encounter. It does one job really really well, and that job is cutting out precise shapes out of a variety of materials. Want to cut a unique shape out of a piece of flooring to it fits just right? The jig saw can do that! Want to cut a T rex shape out of wood to put in your kids room? Look no farther then the Jig saw!
How to use a Jigsaw
- Like every other power tool on this list, the Jig saw is controlled mainly through the use of a trigger. The only other control on it is a speed setting, generally 1-10 that will control how fast the blade moves when the trigger is pulled.
- The blade on this saw moves up and down directly below where your hand is which gives you maximum control of where the saw is cutting. Another feature of this saw is the small narrow saw blade this allows you to cut in very precise ways that aren’t confined to straight lines, its very easy to turn and maneuver the blade as you go.
- To start cutting I would recommend starting with a medium speed such as 4-6 as this will still give you the ability to learn hot to control the blade but won’t be so slow as you can’t cut your material. Its best to start on a thin piece of plywood. Once you have selected place the saw so the metal guide is level and touching the material you want to cut, the saw blade should be close to the material but not touching it. You can now pull the tigger and slowly push the saw where you want to cut.
Well that wraps up A Beginners Guide to Power Tools! I hope you’ve learned a lot and have the confidence to go out and try a few of these tools out for yourself, you’ll be amazed at what your capable of building with just a little bit of practice. Stay tuned for more guides in the How to build just about anything series!