
 Description

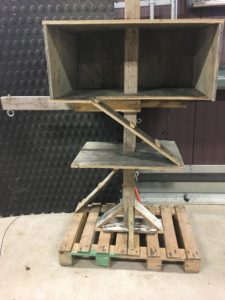
People pay hundreds of dollars for poorly built cat trees at pet stores all the time, but why not just build your own? The cat tree featured in this article was not build specifically for a cat but all the skills/ techniques used here will help you build your very own cat tree custom built for your furry friend. This is a fun enrichment item/ furniture that you can easily use in your personal life as well as professional life by making an existing small mammal/ pet habitat more interactive and fun. The possibilities are endless with this item as you can make as many “branches”, platforms and nest boxes as you want!
Building Materials
- 1, 6 foot 4″x4″ post
- 3/4″ Plywood
- 2, 2″x4″ boards
- Drill and Drill Bits
- Circular Saw
- Tape Measure
- Level
- Pallet (optional as a base)
Building Instructions 

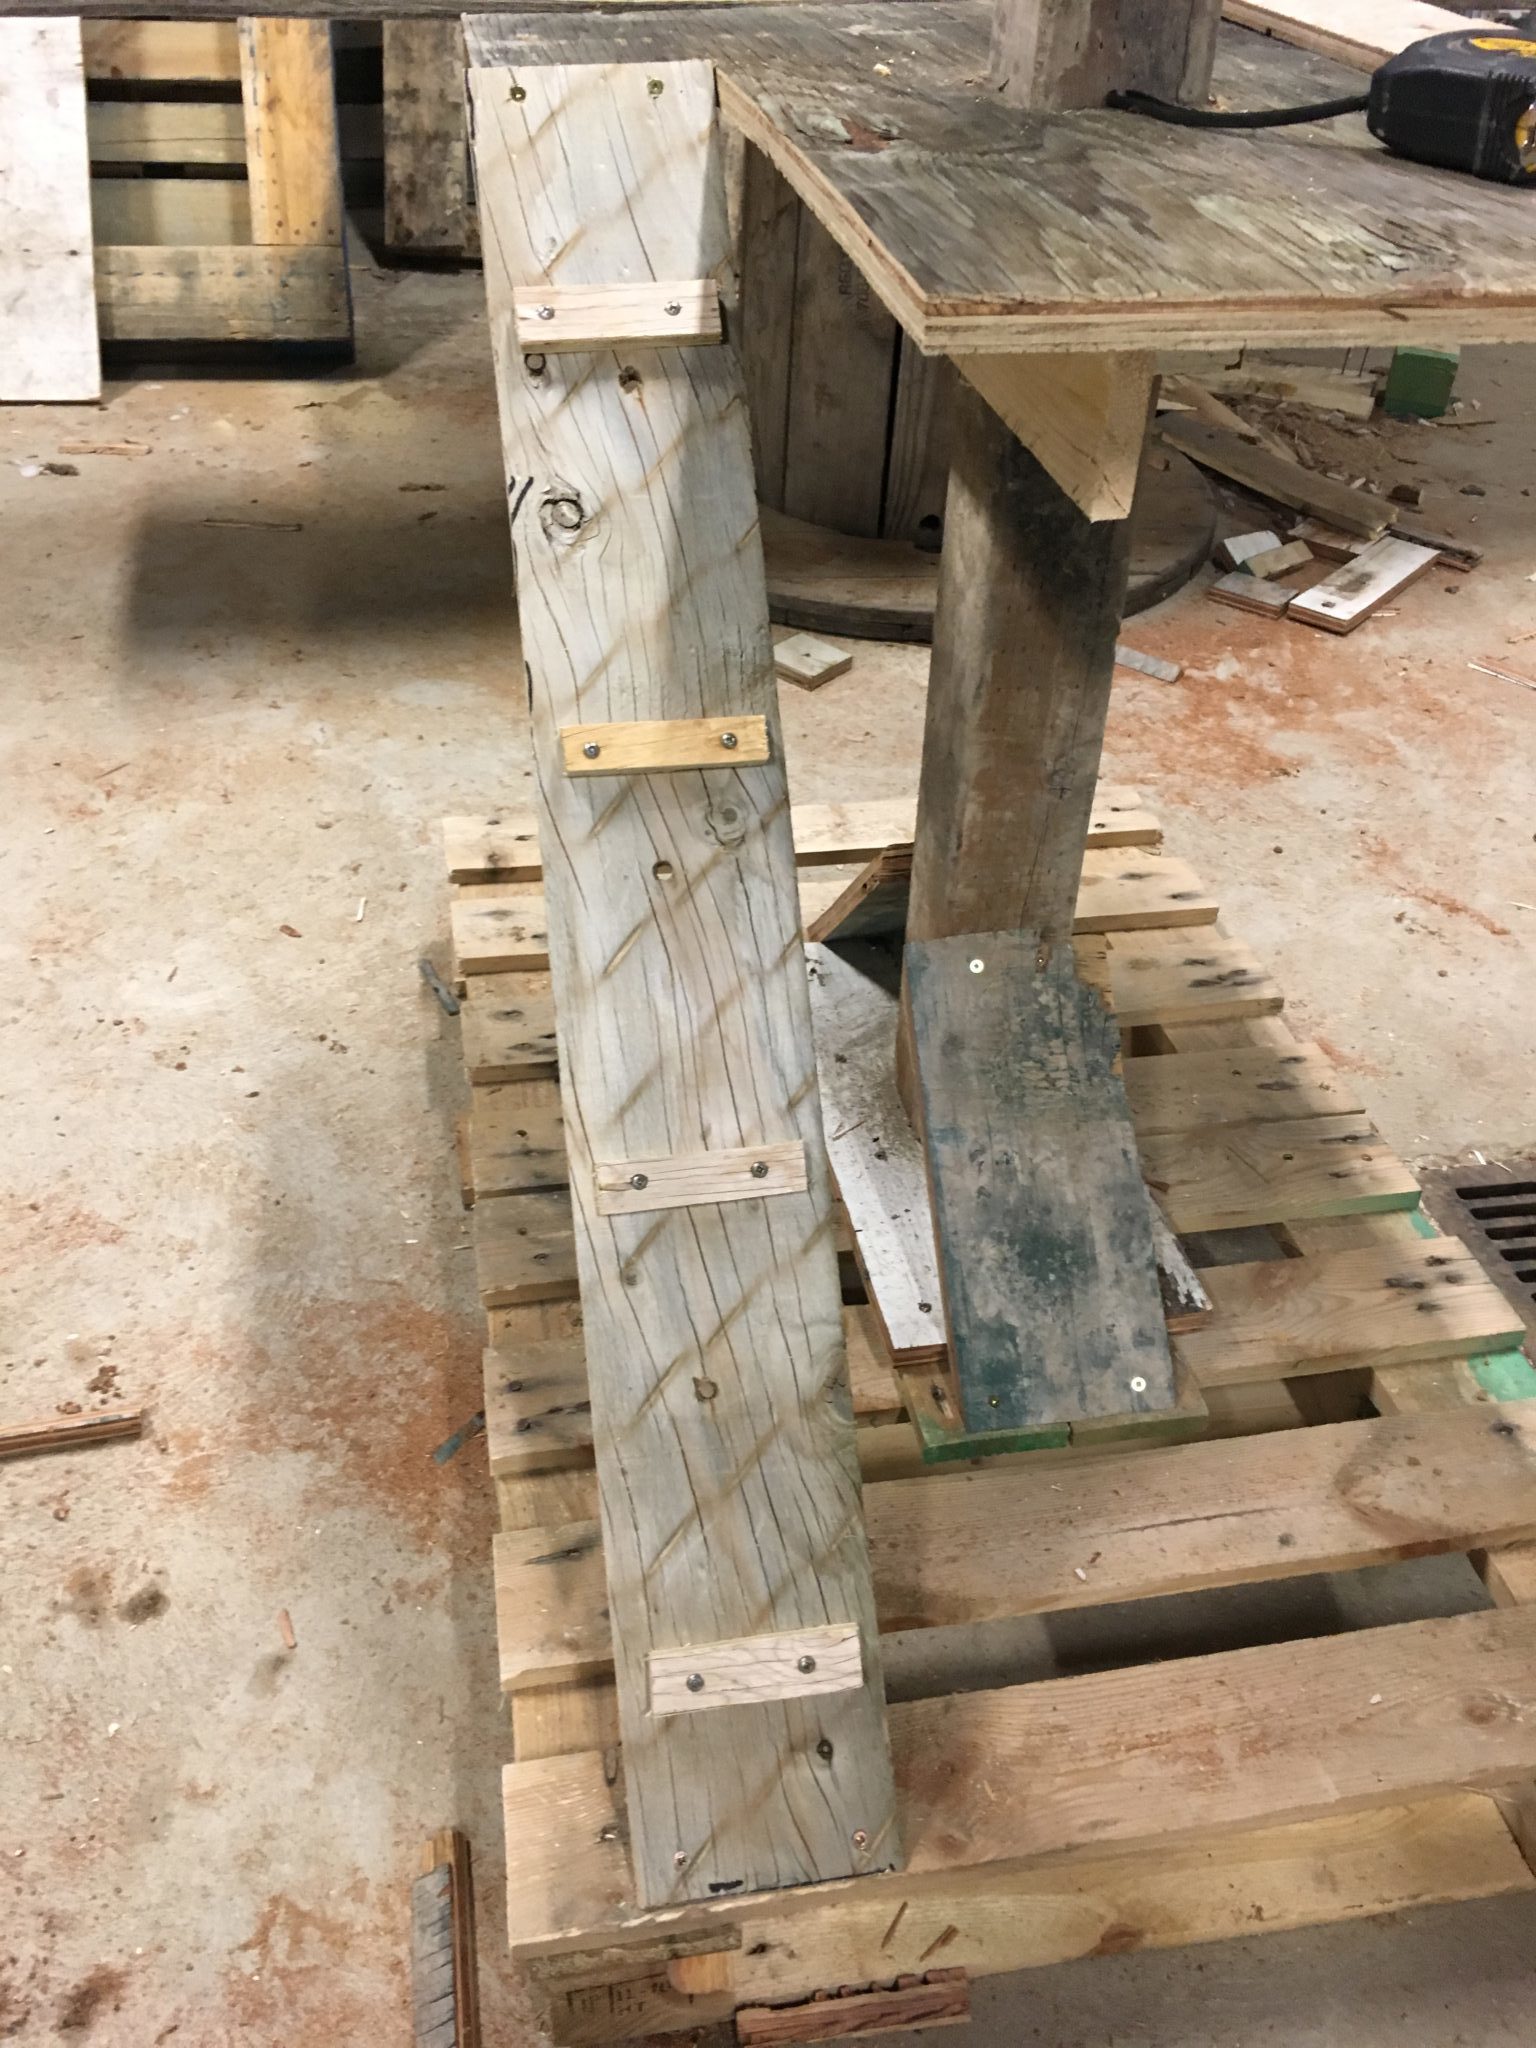
- The first thing you want to do is mount the 4″x4″ to a base so it stands upright and level, this will make it a lot easier to work on and build on. Ive used a pallet and scrap plywood here to show how this can be done with scrap materials, but if its going into your house or yard id recommend making a 2″x6″ base or placing another hide box on the bottom to act as a base. To make my base I simply cut a pallet into 2/3 and screwed a plywood square to the base of the 4″x4″ and then screwed this square to the pallet. Then to reinforce it I cut a few pieces of 4″x4″ at 45 degrees at both ends and screwed them to to 4″x4″ and the pallet.
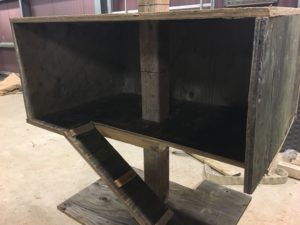
- The Next step you are going to want to take is planning what you want your custom cat tree to look like. What features do you want it to have? Do you want it to have several branches or just one main branch like this one? Once you have your plan you can start to decide on what materials you will need and what your next steps are. This particular tree was made for a fox, so its designed for a much less agile animal then a cat, so I’ve added things like ramps, to accommodate this.
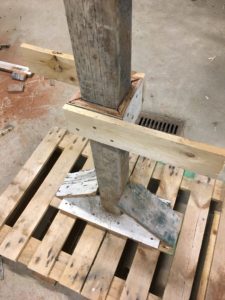
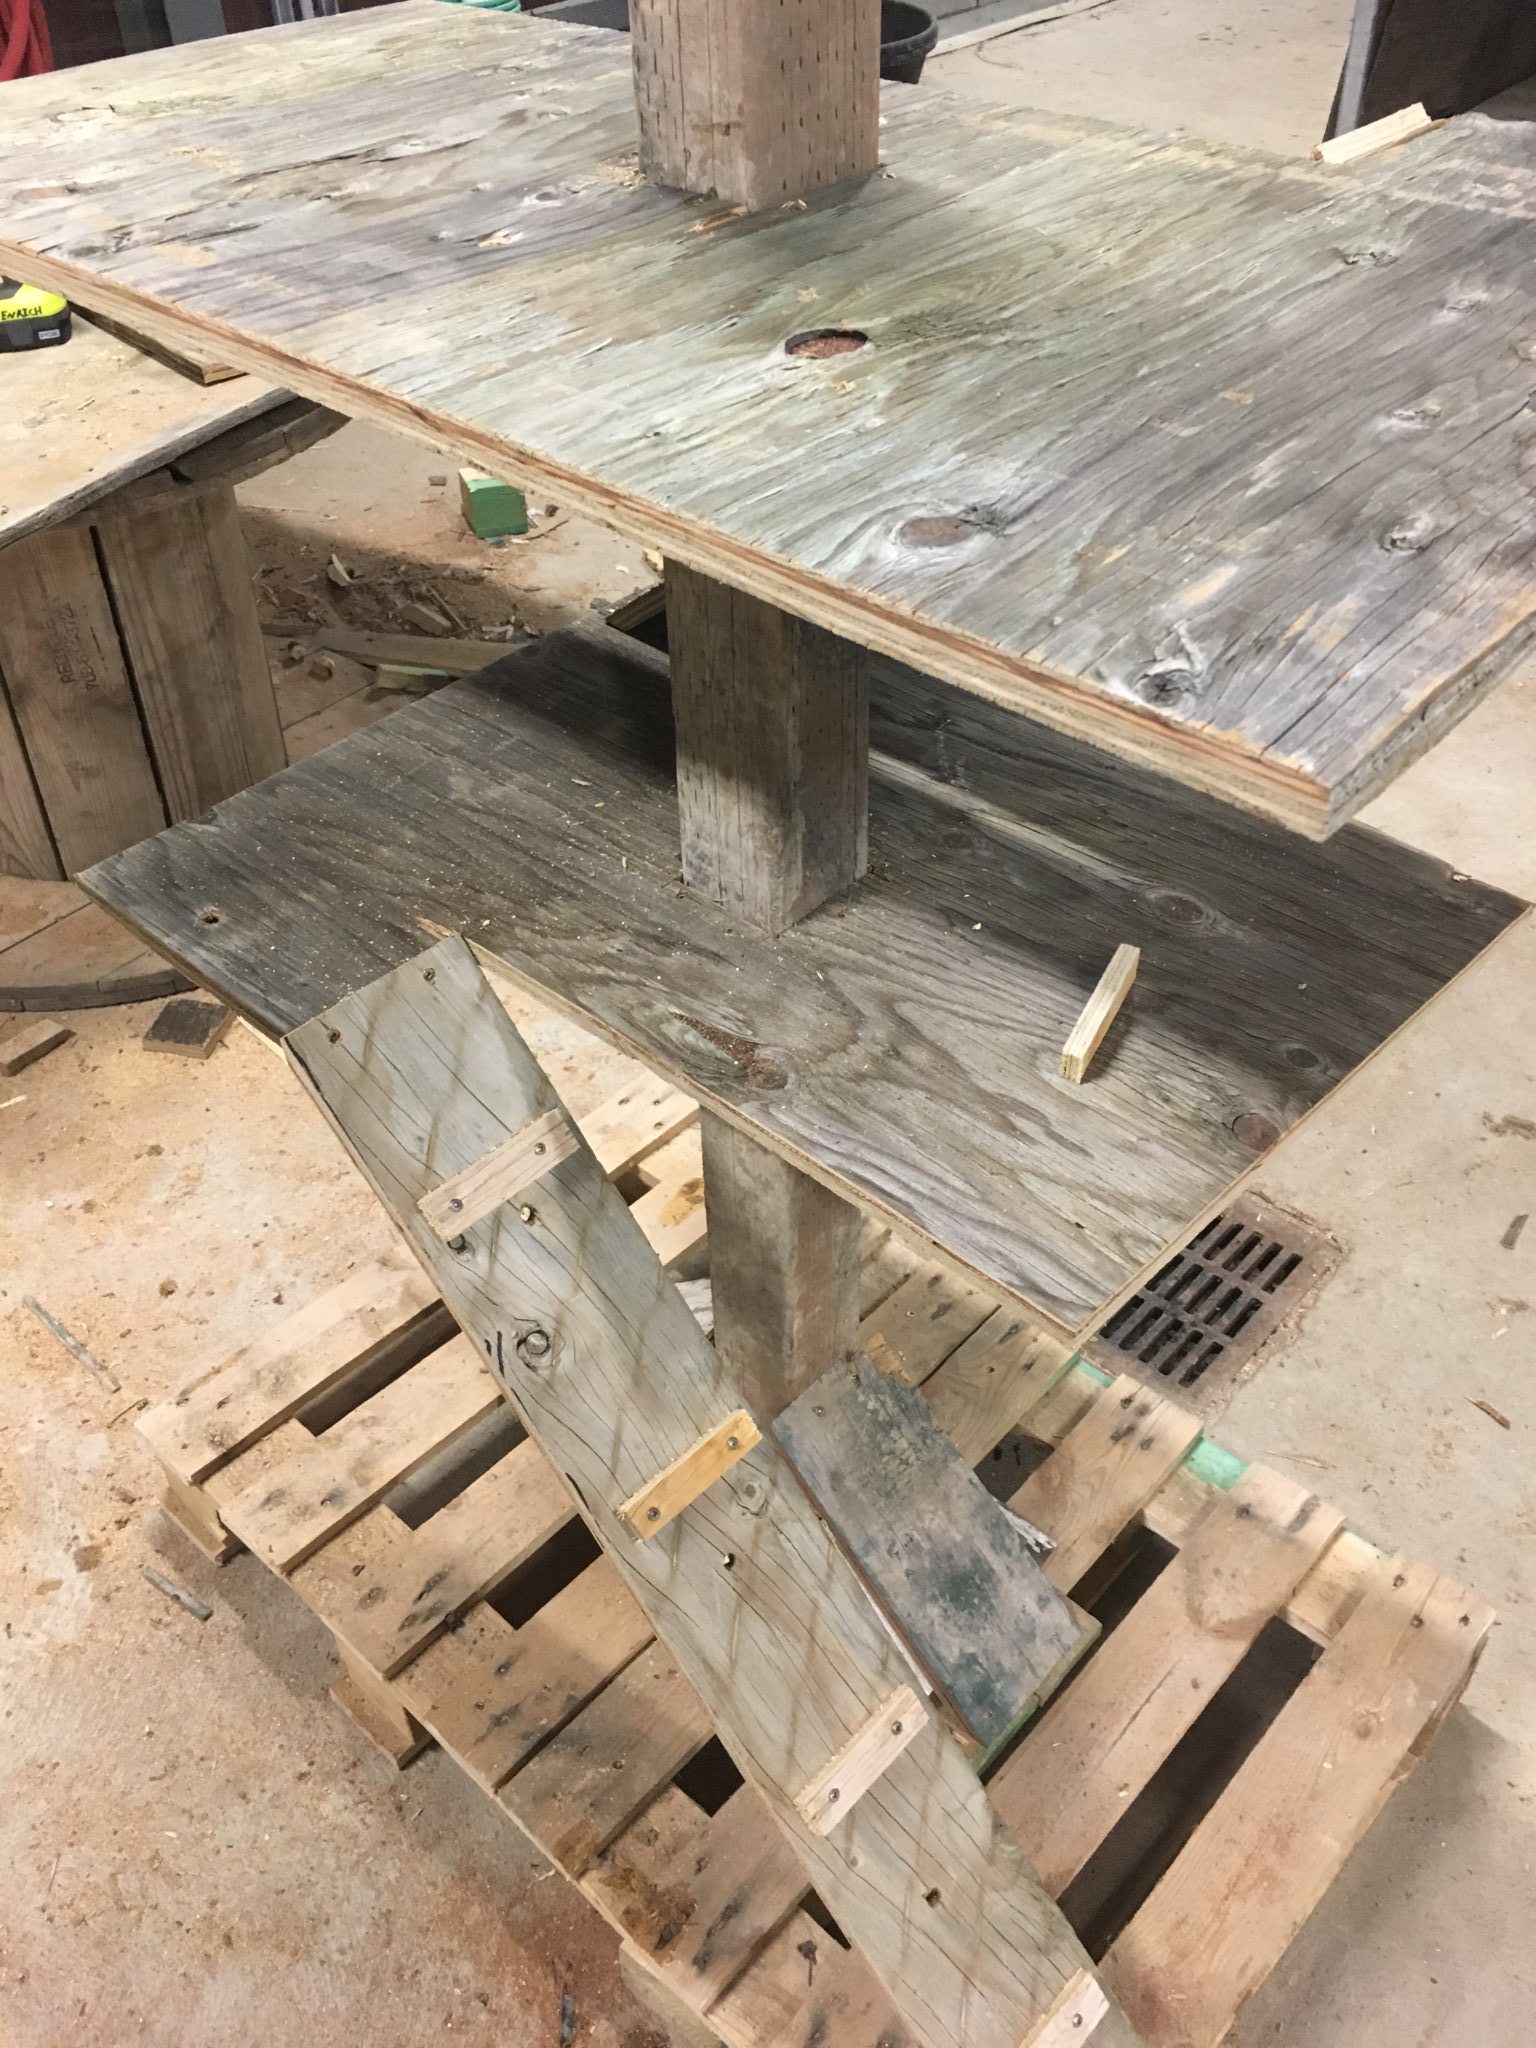
- Since my design might not be similar to the design you have, this build will act more like a template and an example of how to build certain elements of the custom cat tree. My tree goes straight to a base to I started by cutting 4 small pieces of plywood with 45 degree angles on them so that they wrapped around the 4″x4″. To do this with a 4″x4″ simply cut the plywood in 5″ lengths with a 45 degree angle on either side. Then to support the plywood base I cut 2 foot long pieces of plywood that could be attached as well, this was then secured to the plywood wrapping around the 4″x4″ using screws. Make sure these planks are level while you secure them using a level!
- Once you have the planks level and secured to the post they are ready for the plywood base to go on top. To do this I cut a 3 foot by 2 foot rectangle out of plywood using a circular saw. Since I am putting ramps on this tree I also cut out room for the ramp to fit on the platform, in this case the ramp was 5 inches wide and 2 feet long.
- Once you have cut the plywood platform you then need to cut a 3.5 inch by 3.5 inch square in the middle of the piece, with a speed square and a tape measure you can measure this out quite easily. Then using a circular saw you can start the saw over the plywood and slowly plunge it into the plywood on all 4 sides of the square to cut it out. You can then take the plank and slide it onto the 4″x4″ (you may need to adjust your cuts to make it fit) and then screw it to the plywood supports you made in step 3.
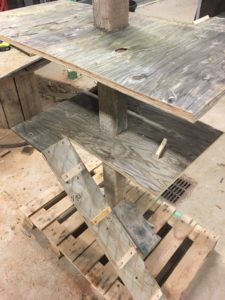

- To make the ramp, simply cut a 5 inch piece of plywood to the length you need for it to go all the way to the ground. You can also cut a 45 degree angle on either end of the ramp in order to secure it properly with screws to the platform and the base. Ive also added rungs to the ramp by taking some scrap pieces of plywood and screwing them to the ramp.
- Here would be a great spot to add some other branches or another platform by following steps 3-6 again. For
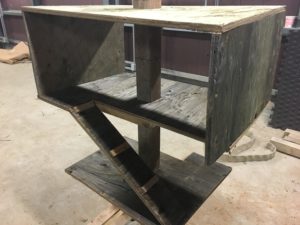 the custom cat tree in the picture I simply made a shelter box at the top of the tree. To do this follow steps 3-6 but cut a larger plywood base/platform, you can cut two of these as you’ll need one for the roof as well. Once you have done this decide on the height you want your box to be and cut a piece of plywood to that height and the width of the plywood base. You can then attach the sides to the roof (making sure to cut a square hole for the 4″x4″ in the roof) and then attach them to the base that you have already secured to the tree.
 - Once you have done this you can attach a back to the tree by measuring the height and width and cutting a piece of plywood that will fit the back. Once this is done the cat tree is almost complete!
- To make my custom cat tree more fun I’ve also attached a lot of eye hooks and places to hang things from so feel free to do this.


Tips/ Comments
If you were going to place this custom cat tree in your home you could easily cover it with carpet using glue/ staples or even paint it or stain it to make it look nice. Have fun with this one and brush up on you carpentry skills while your at it!